This article provides an introduction to the internals of SpaceVim layers, with the end goal being to prepare interested SpaceVim users with creating their own. To achieve this, I'll first present a high-level overview of how SpaceVim layers work in general, then give a demonstration by example of how to create a new one.
Theoretical Overview
Bootstrapping
When Vim is launched, SpaceVim takes over by sourcing
~/.SpaceVim/config/main.vim, where after some compatibility and
environment checks and sets, all SpaceVim features and functionalities
are set into motion sequentially by the 3 core functions below:
-
SpaceVim#begin(), where various basic options are set, common functions and keybindings defined, and default layers initialized -
SpaceVim#custom#load(), where the user's personal configuration, namely theirinit.tomlinside~/.SpaceVim.d/, is processed -
and finally
SpaceVim#end(), where among other important setup steps – such as initializing autocommands, statusline info, a few key mappings and CWD management – the user-enabled layers and their corresponding plugins are loaded
It is from inside SpaceVim#end() where functions responsible for the
loading and configuring of SpaceVim's layers (and thus plugins by proxy)
are called. And these will be the focus of our explorations.
Rationale
As I'd explained in my previous post on SpaceVim, layers are the modular building blocks of SpaceVim. The prototypical layer bundles together related plugins, configures them appropriately, and add keybindings to conveniently integrate their functionalities into SpaceVim.
As SpaceVim development continues, with new features, functionalities and components consistently added, the modularity provided by layers help to ensure the project remains its maintainability and extensibility.
Organization
Inside ../autoload/SpaceVim/layers/, you'll find the vimscript sources
for the actual layers, for example:
../layers/edit.vim../layers/git.vim../layers/fzf.vim../layers/lsp.vim../layers/shell.vim
There also exist layers organized hierarchically under 3 subdirectories
of ../layers/ itself, with some examples being:
../layers/core/statusline.vim../layers/core/tabline.vim../layers/tools/dash.vim../layers/tools/screensaver.vim../layers/lang/haskell.vim../layers/lang/javascript.vim../layers/lang/python.vim../layers/lang/vim.vim
SpaceVim currently provides layer support for 80+ programming languages, with more constantly being added all the time.
Layer Callbacks
A loadable layer "foo" corresponds to a single vimscript source
../layers/foo.vim, inside which callback functions responsible for
hooking up the layer's functionalities to SpaceVim are defined. In
general, there are 3 functions that make up a layer source:
-
SpaceVim#layers#foo#plugins()adds the plugins to be included in layer "foo" -
SpaceVim#layers#foo#set_variable(var)retrieves options local to layer "foo", if any exists, that are set by the user in theirinit.tomlconfig -
SpaceVim#layers#foo#config()configures the plugins added by layer "foo"; and if applicable, defines appropriate SpaceVim autocommands and/or keybindings for the functionalities offered by this layer
When SpaceVim#end() is called, SpaceVim will look for the callbacks
defined above for each enabled layer, thereby loading and configuring
their functionalities.
Practical Demonstration
Now let's put theory to practice with a concrete example. For this, I shall provide a condensed walkthrough that'll highlight the key steps involved in creating my own layer for CtrlSpace, a project navigation and workflow management plugin.
1. Create layer source
First and foremost, you need to create the vimscript source for the
new layer under ../layers/. So for our example, that would be
../layers/ctrlspace.vim.
2. Define layer callback
SpaceVim#layers#ctrlspace#pluginsfor specifying the plugin included in this layerSpaceVim#layers#ctrlspace#set_variablefor retrieving layer-local options set by the userSpaceVim#layers#ctrlspace#configfor configuring key aspects of the plugin and layer
function! SpaceVim#layers#ctrlspace#plugins() abort
    " add plugins for layer
endfunction

function! SpaceVim#layers#ctrlspace#set_variable(var) abort
    " set options local to layer
endfunction

function! SpaceVim#layers#ctrlspace#config() abort
  " configure plugins
  " ...
  " add keybindings to SpaceVim
  " ...
endfunction
And now we shall implement them one by one.
3. Specify layer plugins
The CtrlSpace layer contains the single plugin, "vim-ctrlspace", so we can directly return it.
function! SpaceVim#layers#ctrlspace#plugins() abort
    return [ ['vim-ctrlspace/vim-ctrlspace', {'merged': 0}], ]
    " 'merged' is an optimization flag used by the plugin manager
endfunction
For layers with more than one plugin, you'd add all of them to the return list. Note: the second element in each plugin-list is a table of some flags understood by the plugin manager, which we need not be concerned with for this guide.
4. Get layer-local options
In our layer example, the option home-mapping-key, which defaults
to <C-Space>, sets the main keybinding for invoking CtrlSpace.
Because for many users <C-Space> may already be occupied, especially
if they hail from a non-English speaking part of the world, this
option allows them to change their home-mapping-key to something more
suitable, such as <C-p>.
function! SpaceVim#layers#ctrlspace#set_variable(var) abort
  let s:home_mapping_key = get(a:var, 'home-mapping-key', s:home_mapping_key)
  " ...
  " other layer options
  " ...
endfunction
The get function looks for a string name matching home-mapping-key
(2nd arg) in the list of layer-local variables
(1st arg) set by the user in their init.toml. If it exists,
it will set s:home_mapping_key to the value defined by the user
in their TOML config; if not, it will fall back to an appropriately
initialized default value passed as the 3rd argument to
get.
5. Configure layer
a) main plugin settings
With the plugin made available, and user configurations parsed, the plugin can finally be appropriately configured.
function! SpaceVim#layers#ctrlspace#config() abort
  let g:CtrlSpaceDefaultMappingKey = s:home_mapping_key
  " ...
  " configuration of other plugin settings
  " ...
endfunction
Often times, layer options are made available to user to begin with due to the existence of the corresponding settings in your layer plugin(s) of choice. So in such cases, just hook them up directly like we did above.
b) other plugin settings
An important setting for CtrlSpace is its glob command, which determines how it collects and populates the files list for new projects.
function! SpaceVim#layers#ctrlspace#config() abort
  " ...
  " ...

  if executable("rg")
    let g:CtrlSpaceGlobCommand = 'rg --color=never --files'
  elseif executable("ag")
    let g:CtrlSpaceGlobCommand = 'ag -l --nocolor -g ""'
  else
    let g:CtrlSpaceGlobCommand = ''
    call SpaceVim#logger#info('CtrlSpace: **an appropriate warning message**')
  endif

  " ...
  " ...
endfunction
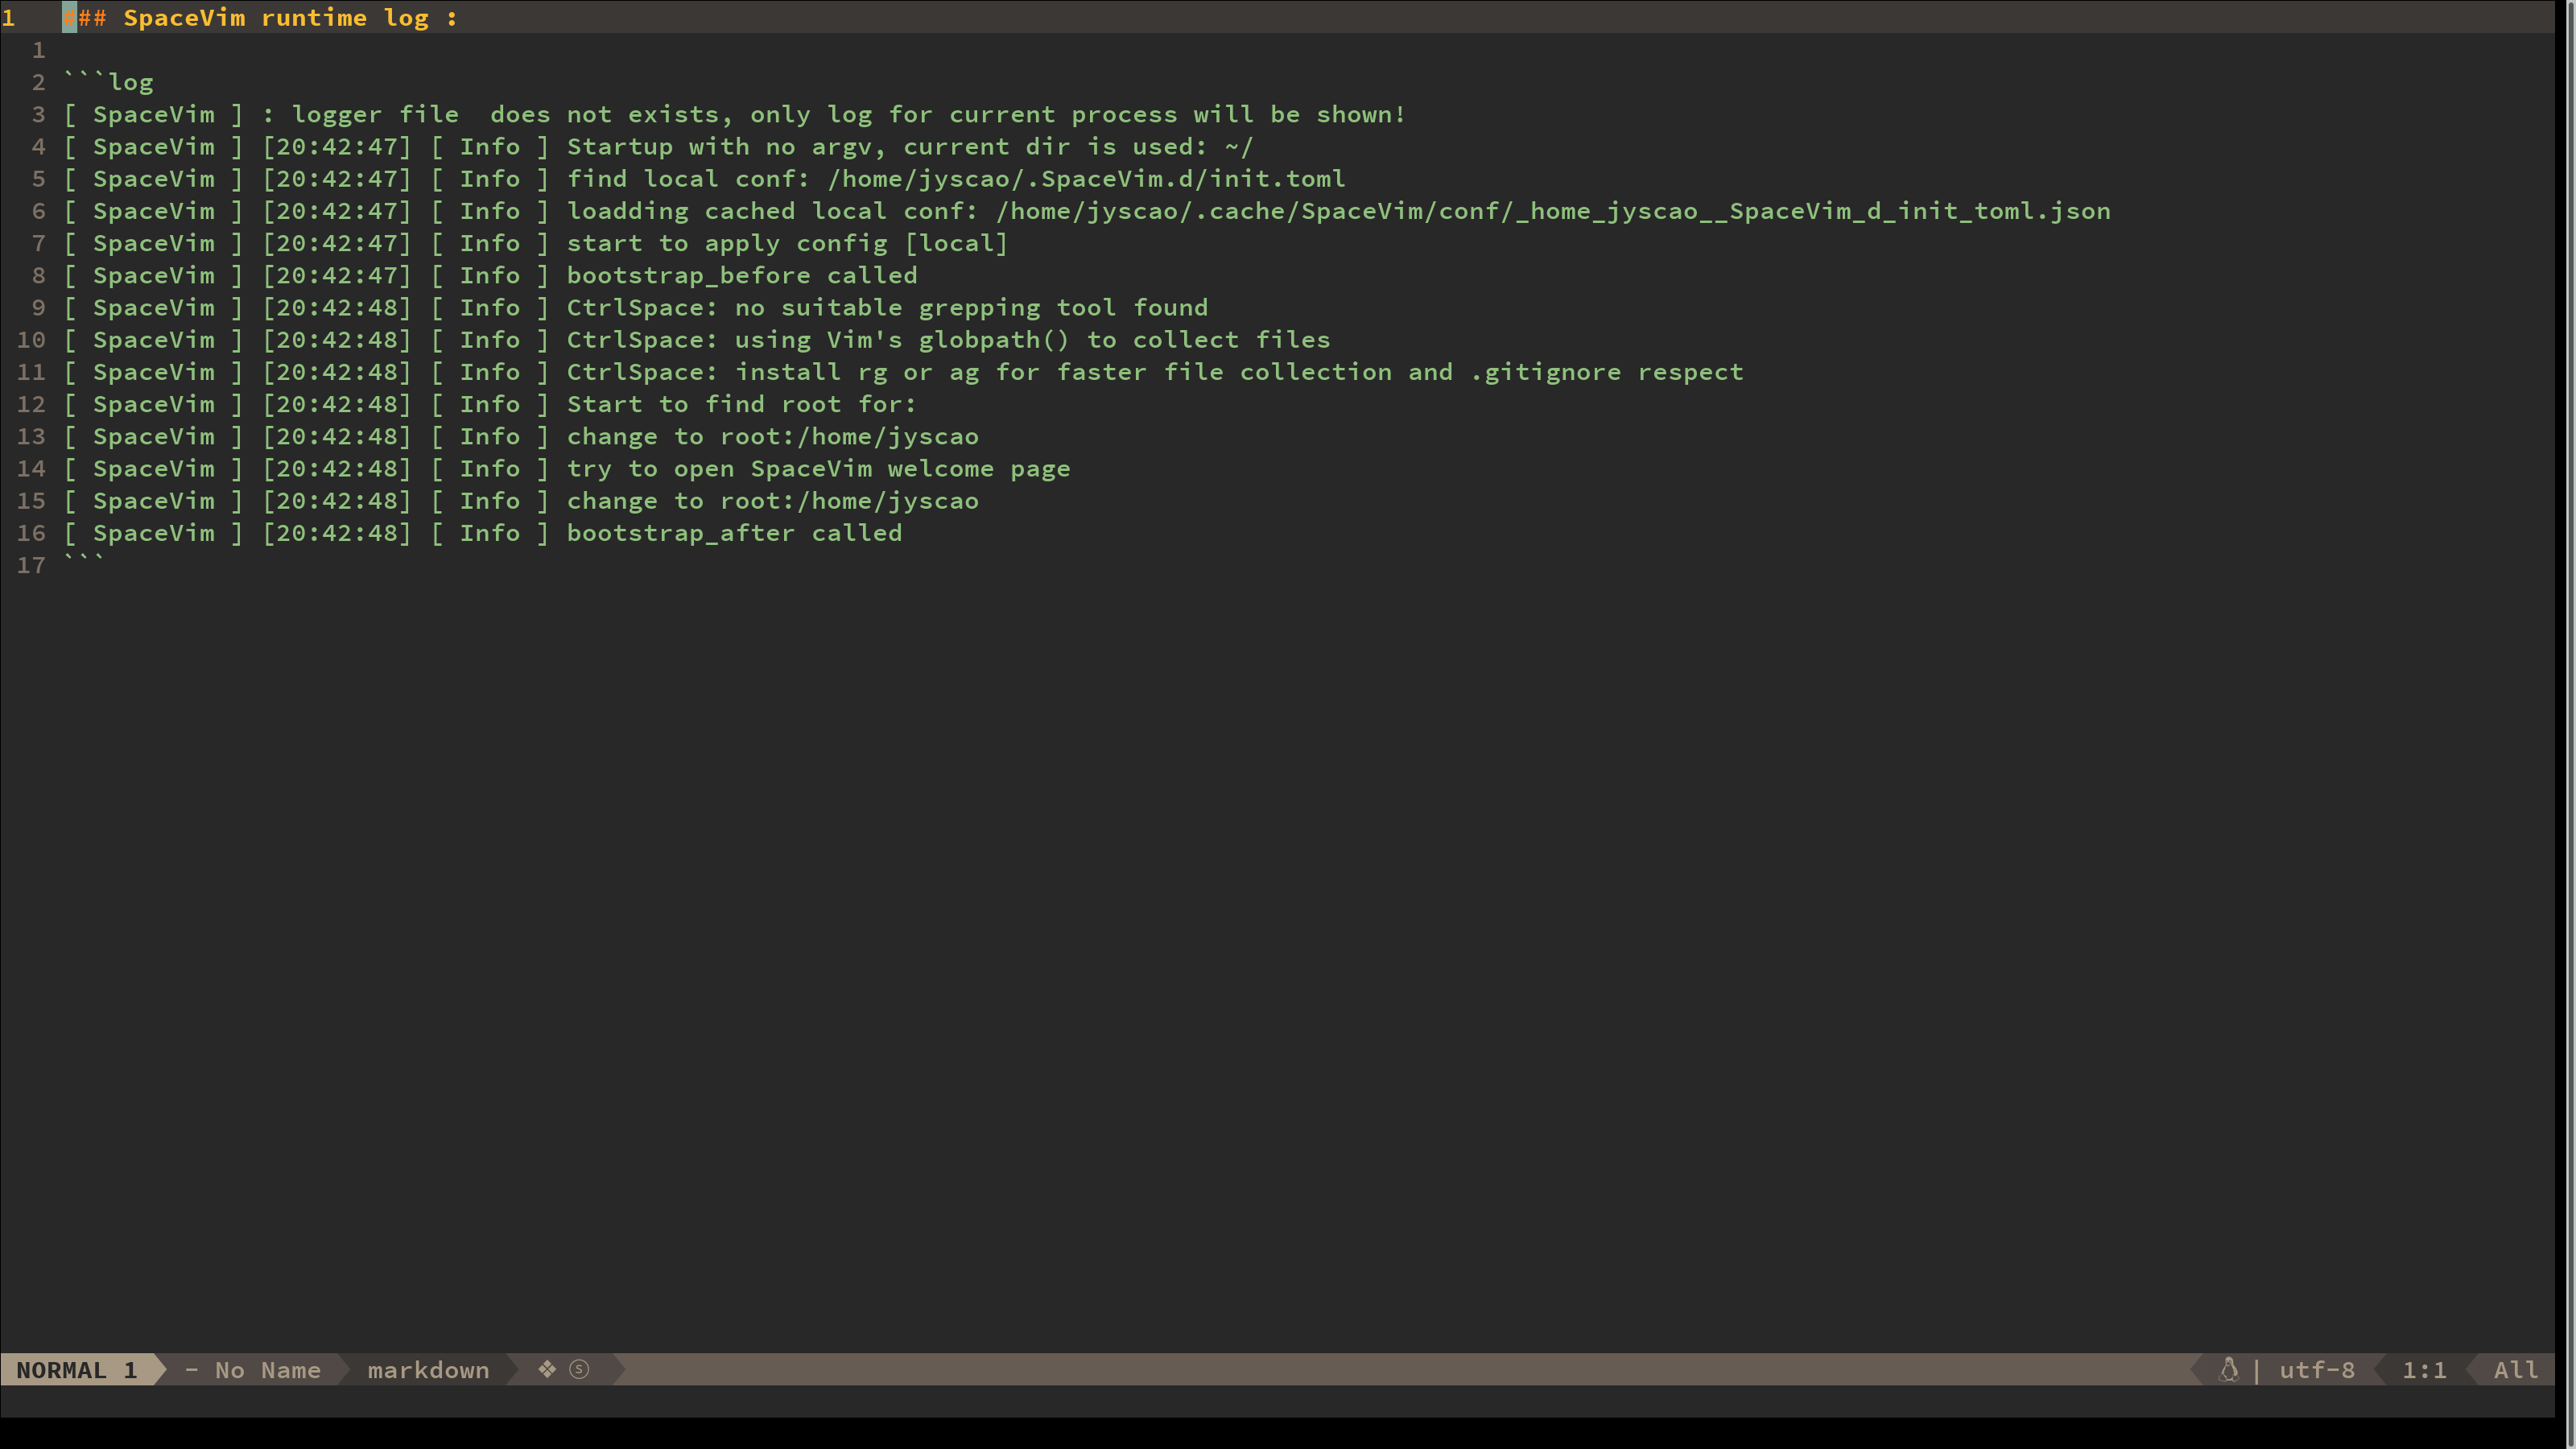
The above snippet also conveniently showcases SpaceVim's logging API,
which has 3 levels: info, warn and error. The runtime log (shown
below) can be viewed with the command :SPRuntimeLog or with the SPC h
L keybinding.
c) SpaceVim keybindings
Here's also a good place to configure keybindings to integrate your plugins' functionalities into SpaceVim.
function! SpaceVim#layers#ctrlspace#config() abort
  " ...
  " ...

  call SpaceVim#mapping#space#def('nnoremap', ['b', 'b'], 'CtrlSpace A', 'CtrlSpace: search all buffers', 1)
  call SpaceVim#mapping#space#def('nnoremap', ['p', 'f'], 'CtrlSpace O', 'CtrlSpace search project files', 1)
  call SpaceVim#mapping#space#def('nnoremap', ['p', 'b'], 'CtrlSpace B', 'CtrlSpace: search bookmarks', 1)
  " ...
  " more keybindings
  " ...
endfunction
To define a SPC-prefixed keybinding for some functionality of your
layer, SpaceVim#mapping#space#def is used. This function takes 5
arguments:
- the mapping type
- the input keys to follow the
SPC-prefix - the command to be executed
- a description for the key-mapped command, which will be displayed in SpaceVim's discoverable guide prompt
- an integer flag specifying the type of command (i.e. a
:command,<plug>mapping, etc.) of the 3rd argument
The most commonly used function you'll be using will be
SpaceVim#mapping#space#def. But mapping APIs for other prefixes (such
as <Leader>) also exist under SpaceVim#mapping#.
6. Test the new layer
To enable your newly created layer, just add in in your init.toml.
For my example, the name of the layer to be enabled is of course
"ctrlspace". I change the main mapping key for invoking the plugin
from its default of <C-Space> to <C-p>, and also enable the SpaceVim
styled keybindings, some of which you saw defined above.
[[layers]]
 name = "ctrlspace"
 home-mapping-key = "<C-p>"
 enable-spacevim-styled-keys = true
If all went well, then you'll have just created a fully functional new SpaceVim layer, just like the CtrlSpace example we went through above.
Final Words
In no particular order, here are a some additional caveats and miscellaneous notes on creating new layers:
-
Language layers are often expected to provide runtime support in the form of REPLs or 'runners'. The APIs for setting those up can be found in
repl.vimandrunner.vimrespectively (both under../autoload/SpaceVim/plugins/) -
Some plugins may require special configurations either at the time of their loading or possibly even before. This can be achieved by creating vimscript sources for them under
~/.SpaceVim/config/plugins/and~/.SpaceVim/config/plugins_before/respectively; then passing theloadconfandloadconf_beforeflags to the plugin manager (just like themergedflag seen earlier) -
Occasionally you might find layers that interact with or depend on others. For example, the git and GitHub layers, and the various
langlayers supported by the LSP layer -
Last but not least, every new layer should be thoroughly documented. Just create a markdown doc, add it under
~/.SpaceVim/docs/layers/, and SpaceVim will automatically render it for viewing on its site using Jekyll.
The primary purpose of this article is to serve as a useful introduction into the internals of SpaceVim layers. But perhaps more importantly, I hope it also provided a bit of inspiration for some of you to give it at shot at creating your own layers. I certainly will continue to do so!